Sunday, March 17, 2013

Cinnamon Rolls

I don't know why, but the idea of baking with yeast has always intimidated me. Maybe it's the fact that the yeast is alive or maybe it's a fear that the dough won't rise or perhaps it's the prep time involved in it. Whatever the issue, whenever I came across a recipe that called for yeast, I'd simply skip over it.


My current job, however, has actually forced me out of my comfort zone and I have found myself making pizza and pretzel dough on several occasions all without incident. (Well, there was this one time, but let's not get into that...) So this week I decided that if I could handle yeast at work, then surely I'd be able to do just as well at home and I finally got around to baking something I've wanted to make for a long time: cinnamon rolls.


Unlike most people, I've never eaten at Cinnabun and cinnamon rolls have never been a breakfast staple for me (too sweet for so early in the morning), but on the rare occasions when I do indulge in a cinnamon roll it's a complete joy. This combined with the fact that I have always been more turned on to sweets than savory when it comes to baking is what inspired this project.


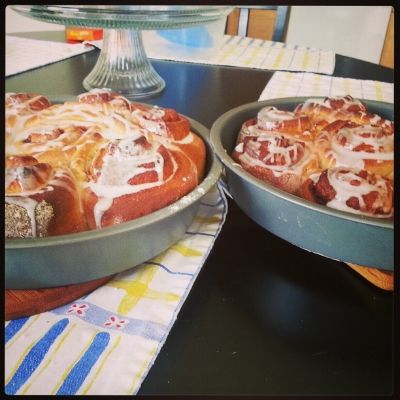
The recipe I found was very easy to follow and the dough came out quite nice. I used a mixture of all purpose and whole wheat flour in the mixture because I am trying to eat healthier and it mostly tasted like whole wheat. This was fine by me since the flavor wasn't quite as overpoweringly rich, so that makes these rolls more of an option for breakfast.


Cinnamon Rolls

Ingredients:

For the Dough:
1 cup milk
2/3 cup granulated sugar
2 packets active dry yeast (1 1/2 tbs)
1 stick (4oz) unsalted butter, softened
2 large eggs
1/4 tsp salt
4 1/2 cups all-purpose flour 

For the Filling:
1/4 cup brown sugar
1 Tbsp cinnamon
2 Tbsp butter, melted

For the Glaze:
1 cup powder sugar
2 Tbsp milk


Directions:
 
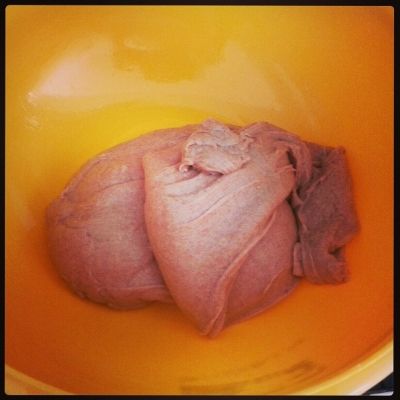
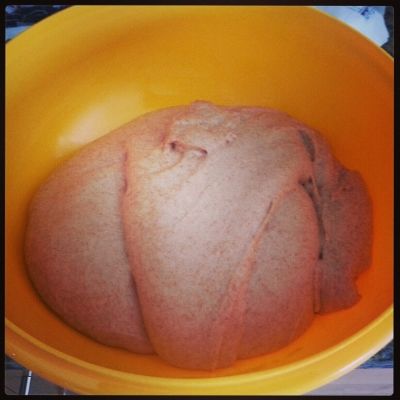
1. Heat up the milk until it is lukewarm (about 40 seconds in the microwave). Pour into the bowl of an electric mixer and then add the sugar and yeast. Cover the bowl with a dish towel and let sit for about 5 minutes, until the mixture is frothy. Next, with the mixer running, add in the softened butter, eggs and salt. Slowly begin adding in the flour until a soft dough forms (feel free to add more dough if the ball appears sticky (I actually added 1/4 cup more myself)). Using the dough hook attachment, beat the dough on medium-high speed for about 10 minutes. Next, form the dough into a ball and place in a well greased bowl. Cover and let sit in a warm place for about 1 to 2 hours, until it doubles in size.

2. Preheat oven to 400 degrees F. Prepare your baking pan (cake pan, pie dish, bundt pan, etc) coating it with vegetable oil or butter. Once the dough has risen, turn it out onto a floured surface and roll it into a 10x24 inch rectangle.

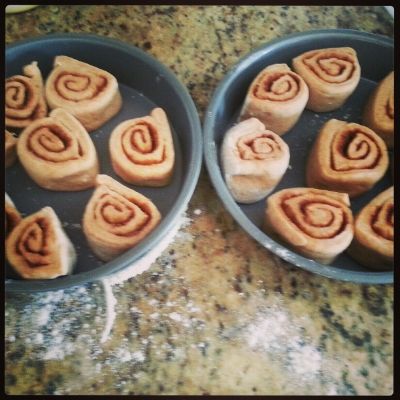
3. Once your dough is shaped take a small bowl and melt your butter. Using a pastry brush, coat the dough with the melted butter. In another bowl, place the cinnamon and brown sugar and mix until combined. Sprinkle the cinnamon sugar mixture evenly along the dough. Next, carefully roll your dough length-wise until it forms a 24" log. Using a sharp knife, cut the log into 16 equal sized slices. 
 
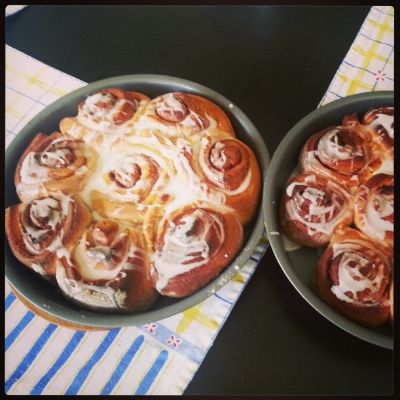
4. Arrange rolls in the prepared baking pans and bake the rolls for about 25 minutes until  golden brown. Let cool. While the rolls cool prepare your glaze by whisking together the milk and powdered sugar in a small bowl. Once the rolls have cooled a little, drizzle the glaze over the top. Serve warm.


(Recipe adapted from Shopgirl blog.)


Sunday, January 20, 2013

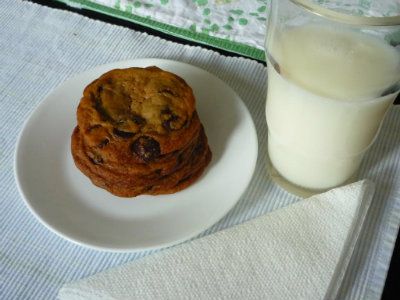
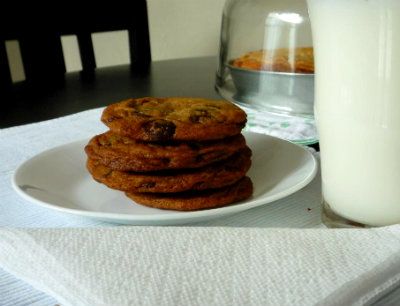
New York Times Chocolate Chip Cookie


            If you’re a baker or a blogger or a baking blogger, chances are you have probably heard of this recipe: the infamous New York Times best chocolate chip cookie recipe, the game changer, the cookie to compare all other cookies to, the recipe that will instantly become your go to chocolate chip, etc. I’ve heard it all. You literally can’t swing a dead cat (if you were want to do such a thing) without hitting up a food blogger who has devoted at least one entry to this cookie.


            I myself first encountered this recipe nearly two years ago, when I had just begun to take my new found baking hobby seriously and was beginning to stray away from my Nestle Tollhouse cookbook in favor of internet recipes. A frequent poster (and professional mom blogger) on the LiveJournal community bakebakebake was the one to post this recipe and as someone who, at the time, had never gone beyond the standard Tollhouse cookie, I was intrigued by the idea that a major paper such as the Times actually recommended this particular cookie. I clicked the link, I looked at the ingredients and the prep work and, being little more than a novice at the time, was a bit overwhelmed by it all. So I saved the recipe, said “someday” and moved on.

            Years later I grew a little bit more experienced in the baking world (wouldn’t call myself an expert as the idea of working with yeast and certain pastries still makes me anxious) and kept bumping into the recipe again and again. Then one day one of my favorite food blogs, Brown Eyed Baker, posted a big “chocolate chip cookie throw down.” Having always been a fan of BEB’s Thick and Chewy cookie recipe, I expected that to be the instant winner, but no! The New York Times cookie won!

            That was the tipping point. I told myself then and there that I would bake that cookie and, three months later (hey you see how infrequently I update this blog, you already know I’m a procrastinator), I did just that. And… meh.


            Now this is by no means a bad cookie. It is good. Very good. The bread flour/cake flour mix certainly does give it a very chewy texture as well as a flavor that is unique and hard to place. Furthermore, the fact that it calls for a lot of chips means you get a mouthful of chocolate in every bite and what’s not to like about that?

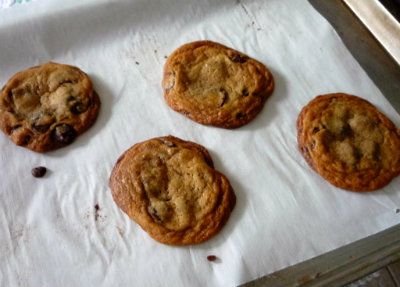
            On the other hand, while the cookies are big, they do come out somewhat flat and I don’t really like thin cookies. And while the flavor is unique it doesn’t knock my socks off. I understand that the whole thing that makes this recipe stand out is the idea of letting the dough rest overnight, but having baked for several years that doesn’t exactly seem revolutionary to me.


            Again, this is just my opinion and I honestly think that everyone should at least try their hand at this recipe, because for you it just may be the best cookie you’ve ever tasted. For me, I think it could use a bit of tweaking, like maybe adding some self rising flour for thickness or using at least one stick of browned butter to give it that caramel taste I that adore. So even though it didn’t win me over, I don’t think that I am done with this recipe yet.


            Even though everyone and their mother has seen this recipe, I’ll repost it here just for the heck of it.

The New York Times Chocolate Chip Cookie (adapted from Jacque Torres’s recipe)

Ingredients:
2 cups minus 2 tablespoons (8½ ounces) cake flour
1 & 2/3 cups (8½ ounces) bread flour
1¼ teaspoons baking soda
1½ teaspoons baking powder
1½ teaspoons kosher salt
1¼ cups (10 ounces) unsalted butter, at room temperature
1¼ cups (10 ounces) light brown sugar
1 cup plus 2 tablespoons (8 ounces) granulated sugar
2 eggs
2 teaspoons vanilla extract
3 & 1/3 cups (20 ounces) dark chocolate chips, at least 60% cacao content
Sea salt, for sprinkling

Directions:

1. Sift together the cake flour, bread flour, baking soda, baking powder and salt into a large bowl and set aside.

2. Cream together the butter and sugars on medium speed until very light, about 5 minutes. Add the eggs one at a time, mixing well after each addition, then add the vanilla. Reduce the mixer speed to low, gradually add the dry ingredients and mix until just combined, 5 to 10 seconds. Using a rubber spatula, fold in the chocolate chips.

3. Press plastic wrap against the dough and refrigerate for at least 24 hours, up to 72 hours.

4. When ready to bake, preheat oven to 350 degrees F. Line a baking sheet with parchment paper or a nonstick baking mat.

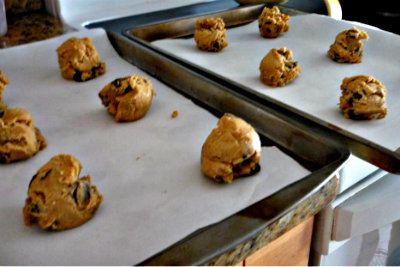
5. Scoop 3 1/2-ounces of dough, roll into a rough ball (it should be the size of a large golf ball) and place on the baking sheet. Repeat until you have six mounds of dough on the cookie sheet. Sprinkle lightly with sea salt and bake until golden brown but still soft, 18 to 20 minutes. Transfer the parchment or silicone sheet to a wire rack for 10 minutes, then transfer the cookies onto another cooling rack to cool a bit more, until just warm or at room temperature. Repeat with remaining dough (or keep some of the dough refrigerated for up to 3 days, and bake cookies at a later time). Store leftover cookies in an airtight container at room temperature for up to 3 days.

Saturday, December 15, 2012

My 2 Cents: The Hobbit

It's been a while since I've posted anything here and since I originally intended for this blog to focus on baking and movies, I think it's fitting that I give my first official review to The Hobbit.

Spoilers ahead. You have been warned.

First of all I have to say that I saw the movie in the special 48 frames 3D version. For those who don't get what's the big deal, I'll briefly explain what little I know. From what I understand, the standard method of filming has been 20-30 frames per-second since the 1920s because that was the most cameras of the time could capture. 48 frames per second is closer to what the human eye sees in every day life and is what most modern video games render. As a result the motions within the film look a lot smoother and faster and at times look a bit like a video game. It took a while to get used to, but personally I didn't really like it for this movie. I just didn't think it fit since a lot of the more memorable moments of LotR were the ones where the camera slows down in order to emphasize the gravity of the scene and seeing things move at times cartoonishly fast didn't sit right with me. But again that's just me and if you want to see the film this way, go for it.

Personally I get motion sick very easily so I went to the drug store and got some medicine before watching it. A lot of people apparently got headaches from this camera, but I felt fine thanks to the Dramamine that I took. But I was sleepy. Really, really sleepy (the fact that I had been working long shifts all week didn't help) and when I got home I just outright collapsed. So, again keep this in mind before you go see the 48 frames 3D.

Now, let me start by saying that I really liked it. It was just what I wanted it to be: a lot of fun. That being said it wasn't a perfect movie and there were things about it that could have been better. I didn't see any critical reviews before I went to see the movie, but I was really surprised to find that The Hobbit only rated a 58 out of 100 on Metacritic, which is to say it's getting a lot of mixed reviews. It didn't really shocked me that The Hobbit wasn't the critical darling that the LotR films were, but I didn't think it was a completely weak film either.

Skimming through the critical reviews I noticed two issues coming up among those who gave the film middling/low reviews: "it's soooooo loooooong" and "the effects look really phoney." To the first complaint, I have to say that whoever went into this movie thinking it was going to be brief is an idiot. Do you not remember how long the other movies were? One of my coworkers even tried to warn me about the movie's length before I went to see it. I politely laughed her off, but really how can that be an issue? That point is officially invalid to me. The other issue.... well, the best way to go over the movie is to break it down into three points: Things I liked, things that disappointed me, and things I didn't like. (Keep in mind that "disappointing" doesn't really equal bad, but were ideas that could have gone better or probably just bothered me.)

Things I Liked


1) Martin Freeman as Bilbo. Oh my flipping gosh he was perfect. Every single scene with him was my absolute favorite and he fit the role just right. Yeah, you can argue that really it was just Martin Freeman doing his usual schtick of being the fussy, overwhelmed guy who gets thrown into weird situations, but to me it just worked. I loved his facial expressions, I loved how he just seems so floored by everything, and I loved all the little things he does with his body to express his discomfort. To me it was just all around gold and I to rewatch all of his scenes and just smile.

2) The Dwarves. I really liked that we got to see more of dwarf culture and more dwarves in general. There were even brief glimpses at dwarf women and children (I think. It was very fast.) and since LotR focused so much on elves and men (and hobbits), seeing actual dwarves was nice. It was also really great that they had a fighting style that was all their own. When you see the dwarves fight its a lot of bashing and swinging and spinning. It was really a lot of fun.

3) The visuals. It pretty much goes without saying that the wide shots and landscape was absolutely perfect, because Peter Jackson just knows how to capture New Zealand, but it really did feel like coming back to a familiar world and that was nice.

Now on the issue of the computer effects... I have to say it's hard for me to comment on it, because the 3D version I watched really did give the whole film a very glossy look that made it hard for me to tell what was practical and what was computer rendered. I will say that I feel like the goblins were mostly CG characters which I didn't like, because what made the orcs great was how real they looked, but other than that everything looked well done to me. I guess I'll be able to comment on it more after I rewatch the film in 2D. But I can say that Gollum looks amazing. You'd think there would be no way to improve him, but he looks even more realistic now than he did back in 2003.

4) All the scenes that stayed true to the book. Obviously since this is being stretched into 3 films, there were a lot of scenes in Unexpected Journey that weren't from The Hobbit. Those parts I'll talk about later. The book scenes were great. I actually read The Hobbit back in high school, so I went in knowing all the parts a head of time, which gave me a different viewing experience from any of the LotR movies. So I was smiling when the dwarves came crashing into Bilbo's hobbit hole, I loved the fight with the trolls, and I really enjoyed riddles in the dark.

Disappointing Things


1) The music. This is probably me being nit-picky, but I felt like the score sounded too much like it was recycled from the other films. Maybe it's just me wanting too much, but I was hoping that since the Hobbit was more of a fun, carefree (sorta) adventure we'd beg a more upbeat and wonder inducing score with a few touches of the old music. Instead we got sort of the same thing, but with a new badass, bassy theme for whenever the dwarves are doing something cool. It's an Oscar winning score so of course it's good, but it could have been better. To me at least.

2) Not enough of the Shire. Now a lot of reviewers complained that there was too much of the Shire because it took an hour or so for the actual quest to start, but to me that's a dumb complaint because if you'd read The Hobbit, nothing about that would have surprised you. It was basically the first two chapters being filmed and I think that issue just comes out of people wanting this movie to be a LotR clone. That being said, I'm very much a hobbit lover. Remember that long sweeping sequence from Fellowship that introduced us to hobbits and hobbit culture? I wanted more of that. I knew there would be padding in the film and I was hoping some of the padding would involve Bilbo's actual life in the Shire pre-Gandalf and him dwelling a bit longer on whether or not he should go on an adventure. But no, we didn't get that. We didn't even really get to interact with any other hobbits and that really disappointed me.

Things I Didn't Like


1) Thorin. Now, my problem with Thorin started from the moment I saw his character design. It didn't match up with the image I had of Thorin, because he looked too young and too human. This was made even worse when they outright said they wanted to make him the Aragorn of this movie. Why? We have an Aragorn character who comes in later in the book. I guess I understand because the movie fans were going to expect someone to fill the action heavy leader role and I went in saying to myself "just deal with it." Yet I didn't really get drawn in to him, because he was very much like a dwarf version of Aragorn. Maybe it's a little harsh to say I didn't like Thorin, because really my feelings for him can be summed up as "meh," but still I couldn't get into his backstory or his motivations. Of the dwarves my favorite was probably Balin, but mainly because he reminded me of Hudson from Gargoyles.

2) Radagast the Brown. Boy oh boy I did not like this character. Every time he was oh screen I though "oh geez, he's here again." Radagast is another character that I wasn't really expecting to love, but I still didn't enjoy. Let me make it clear that he wasn't a bad character, because he was goofy, but not completely incompetent which I appreciated, but I just... no... Also, his costume will either make you laugh or groan. (There's a white residue along the side of his face that had my brother and I debating on whether it was tree moss or bird crap. I thought it was bird crap.)

3) The old Bilbo sequence. This is really disappointing for me because I was actually looking forward to this part. I mean I see why they did it, sort of, because it gives us a prologue and some backstory about the city of Dale and the dwarves and why they're going on this quest and that's good, but it could have been done without including Ian Holmes Bilbo. I guess what really bothered me about this sequence was the fact that it took place the same day as the birthday party. I was hoping it would take place a couple of years or at least a week before the events of the Fellowship, but nope. It's five minutes before everything kicks off. When Frodo comes in an announces that Bilbo's birthday party is that day I wanted to scream "You've gotta be kidding me!" Because to me, it's just really really pointless. It doesn't add anything new to the character of Bilbo or his dynamic with Frodo. It just felt like an excuse to get Ian Holmes and Elijah Wood back in hobbit gear and really it could have been done better.

4) The attempts to tie into/make the film the Lord of the Rings. This is probably my biggest complaint with the movie. Once again, I saw this coming, but I still didn't like it. Before we saw the film I told my brother, who had never read any of the books, "Don't expect it to be the Lord of the Rings. This isn't the Lord of the Rings." but when we left the theater I heard someone saying to their friend "Now you have to watch the Lord of the Rings" and that really annoyed me.

In terms of the books, The Hobbit was very different in tone from LotR and I was really looking forward to that, but the movie went out of its way to add some weight and conflict were there wasn't any and it did feel forced. For example there was a council scene between Galadriel, Elrond, Gandalf, and Saurman that just felt really unnecessary and was only enjoyable because, yay, we're seeing Galadriel and Saurman again.

I guess the main "problem" is that at its core The Hobbit is story about a treasure hunt and that's not enough to make a movie out of, there needs to be more conflict and urgency see than that. Yet I feel that there could have been better ways to add a more serious tone to the movie, things that they did put in, but didn't focus on. Such as the idea of the quest changing Bilbo, how he's going to come back a different person or the idea that the dwarves aren't just out of fight Smaug for the gold, but to find a home. They talked about those things, but it's as if they decided that it just wasn't good enough. Walking away from this movie, the biggest issue that I have is that the things I complained about likely won't be fixed. They're here to stay because we're stretching one book into three films.

So overall, I think that if you liked the Lord of the Rings films and never read/don't care for The Hobbit/the books, you're probably not going to like An Unexpected Journey. If you really really liked The Hobbit book, you'll probably like this movie, but feel it could have been better. I certainly think it's worth watching and I'll probably go back and see it again in the near future.

Sunday, January 22, 2012

Snickerdoodle Cupcakes

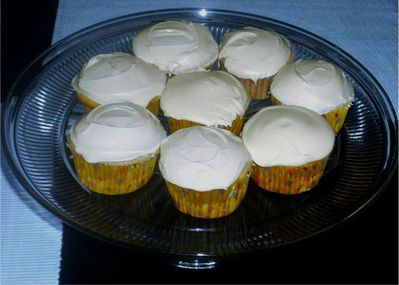
Lately I have become pretty obsessed with the baking blog, Brown Eyed Baker. A few weeks ago I tried out her recipe for vanilla cupcakes and while I found the cakes themselves to be a bit on the heavy side, I thought the flavor was out of this world.

This week I decided to test my hand at the Snickerdoodle cupcake recipe posted there I knew I just had to try my hand at it, because I love snickerdoodles and I adore cupcakes, so it was a perfect match for me.

Photobucket

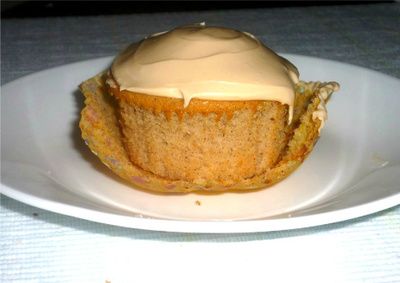
Unlike the vanilla cupcakes, the cake part was just right for me. Very light and fluffy and tasted just like the cookie. My only complaint would be that while the cupcakes weren't dry, they also weren't moist enough for my tastes.

Now I have a confession to make: I haven't been making frosting from scratch for a while now. I've basically been scared away from it because the last few times I've whipped up a batch of frosting, the results were very runny and loose. After a while, I came to the conclusion that nothing I was doing had caused this and the problem was simply that the kitchen was too hot, but since then I have been buying canned frosting and adding little things to make it taste less chemically.

This week I added a bit of homemade dulce de leche to a vanilla frosting can and the results were... alright. the main flaw was that there wasn't enough dulce de leche to add, because my family had picked away at the batch over the week until there was very little left.

Photobucket


The main thing that I walked away from this experience was that I am now ready to go back to making frosting from scratch. I have one last can which I will use next week, but after that, I will be done.

Monday, August 22, 2011

M&M Marshmallow Cookies

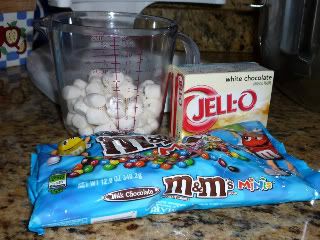
This is actually a recipe that I have been meaning to share for a while now and I feel that it’s perfect for the back to school season. If the mini marshmallow and candy coated chocolates weren’t enough to sway you, then you’ll absolutely love the added flavorful gooeyness you get from the special ingredient: white chocolate pudding mix.

I came up with this recipe after modifying this older version, which is itself a modified version of this original recipe.

Photobucket
The star ingredients

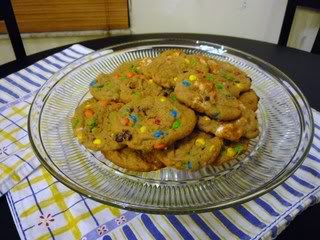
In my opinion my version is the best, but I mostly came up with it by being a bit of a cheapskate. As many of you bakers may have noticed, the prices of chocolate chips have really gone up recently. I believe that only a few months ago most chocolate chip brands were around $2 for a twelve ounce bag, now the same size has gone up to nearly $3! So when I went shopping for ingredients I decided to nix the chocolate chips all together and replaced them with M&M minis. (Baking M&Ms will also work, but they have recently disappeared from stores in my area, so I was unable to use them.) Personally I feel that using more M&Ms not only gives the cookies a fun look, but also adds a nice bit of crunch to the chewy texture.

Photobucket
Can’t you just smell them through the screen?

M&M Marshmallow Cookies

Ingredients
2 ¼ cups all-purpose flour
1 teaspoon baking soda
1 cup butter, softened
¾ cup packed brown sugar
¼ cup white sugar
1 package instant vanilla pudding mix
2 eggs
1 teaspoon vanilla extract
2 cups M&M minis (or baking M&Ms)
1 cup mini marshmallow

Directions

Preheat oven to 350°F. Sift together the flour and baking soda, set aside.

In a large bowl, cream together the butter, brown sugar, and white sugar. Beat in the instant pudding mix until blended. Stir in the eggs and vanilla. Blend in the flour mixture. Finally, stir in the M&Ms and marshmallows. Drop dough by rounded spoonfuls onto an ungreased cookie sheets.

Bake for 12 minutes in the preheated oven until the edges are a golden brown.

Makes approximately 4 dozen cookies.

Tuesday, July 26, 2011

Red Velvet in July

I’m ashamed to admit that I have fallen far behind in updating this blog, but there have been a lot of things that have been taking up my time. First of all, I recently got a new job. Yep, after two whole years of being unemployed, I’ve finally rejoined the working world. I’m currently working at this little business that’s objective is to help instill healthy eating habits in kids by teaching them to cook at home. In a lot of ways you can say that this place is a natural fit for me since it’s all about baking. It also helps that things are slow at the moment, so it’s not a big shock for me, going from hang around the house all day to being bombarded with customers. It is still early though. I’m sure by the holidays roll around, we’ll be quite busy.

And if working again weren’t distracting enough, there was a cold that was running its course through my family and I caught it. It wasn’t a bad bug, but since I had literally just started my job at the time, I was quite annoyed. (Note: I was not working with any food or children while sick.) So my drippy nose and constant sneezing kept me even further away from the kitchen. Such a sad state, isn’t it?

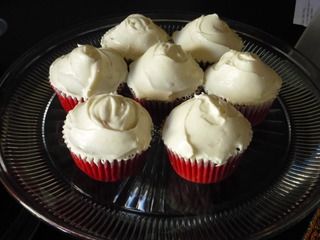
The good news is that after being under the weather for almost a week I’m feeling much better and a few days ago I found out my cousin was coming to town and she wanted me to bake something for her. Of course I agreed and decided to bake her some red velvet cupcakes.

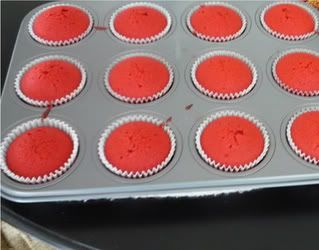
Photobucket
As you can see, these babies are very red

Now I know what you’re thinking: “Red velvet? Isn’t that a holiday treat?” Well, yeah it’s definitely not as summery as, say, a blueberry pie, but I asked my cousin what she wanted me to make and she said anything except a pie and since I’m the one who is going to be doing the baking (and because I’ve been absolutely craving it) I decided to just do it.

The recipe I used was one adapted from Paula Deen, who is my go to girl for all things red velvet, because how can you go wrong with Paula Deen?

I will admit to one thing though: I committed something of a red velvet sin with these cupcakes. As many bakers will tell you, a red velvet cake does not equal a chocolate cake. That being said, the cocoa powder should be used sparingly, but since my mother (who is one of my biggest critics as well as my “mentor”) always wants “more cocoa” in her red velvet, I used much more than was necessary, but I’ll go ahead and repost the recipe as listed on Food Network.com.

Red Velvet Cupcakes

Ingredients
2 ½ cups flour
1 ½ cups sugar
1 tsp baking soda
1 tsp salt
1 tsp cocoa powder
1 ½ cups vegetable oil
1 cup buttermilk (room temperature)
2 large eggs (room temperature)
2 Tbsp red food coloring
1 tsp vinegar
1 tsp vanilla

Directions
Preheat oven to 350°F. In a medium mixing bowl, sift flour, baking soda, sugar, salt, and cocoa and then set aside. In a large bowl gently beat vegetable oil, buttermilk, eggs, food coloring, vinegar, and vanilla. Add dry ingredient mixture to the wet mix until smooth and combined.

Divide batter evenly among cupcake tins about 2/3 filled. Bake in oven for 20 – 22 minutes, turning pan once half way through. Let cool completely before frosting. Makes ~24 cupcakes.

Photobucket

Saturday, June 18, 2011

Oreo Cake

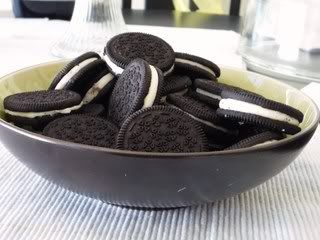
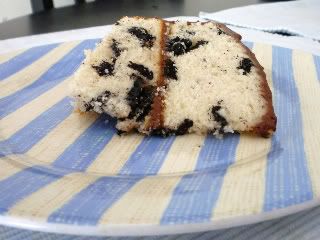
You read the heading right people, it’s an Oreo cake. The idea for this is not my own. I was inspired by the envy inducing baking blog I Am Baker (seriously, browse through that blog and try not to feel inadequate) and its brilliant maintainer. I’ve wanted to try my hand at this cake for a while now, but other baking projects kept getting in the way as well as the sad fact that Oreo cookies are quite pricey. The first problem fixed itself with mere patience; the second however is where I cheated. Technically the sandwich cookies I used are not in fact Oreos, but a cheaper store brand substitute. For the sake of the recipe, however, I’m going to continue to refer to them as “Oreos” since it’s easier than “chocolate sandwich cookies.”

Photobucket
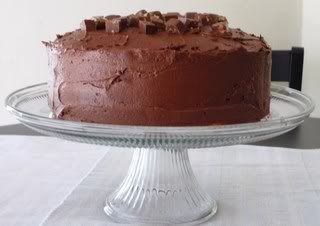
Sorry these pictures all came out so slanted.

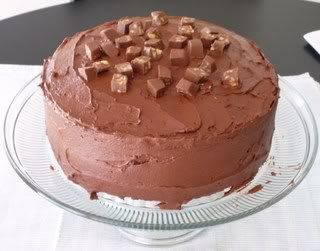
As you can see from the two posts, these cakes are not the same. Both cakes are made from a white cake base with chopped up “Oreo” cookies, but there are key differences. While Manda of I Am Baker made her Oreo Heath cake with vanilla Swiss Meringue buttercream icing, topped it with chopped up Heath bars, and used Heath bars for the filling, my cake is less imaginative, but quite tasty in its own right. For my recipe, I used chocolate cream cheese frosting and chopped about five Hershey’s Nuggets to use as a topping.

Either way you want to finish it off, I highly recommend baking this cake. It’s a very simple recipe that comes out quite enjoyable. It’s crunchy and soft all at once, not to mention the different “look” of it.

Since I Am Baker does not list a recipe for the Oreo Heath Cake, I adapted this from a white cake recipe I found in Simple Old-Fashioned Baking. (It’s a useful book).

Oreo Cake

Ingredients
24 “Oreos,” chopped in fourths
½ cup butter, softened
½ tsp vanilla
1 ½ cups sugar
5 egg whites
3 cups AP flour, sifted
½ tsp salt
4 tsp baking powder
1 cup milk


Directions

Grease two nine inch cake pans and preheat oven to 350°F. Cream butter, vanilla, and sugar in a bowl until light and fluffy. Continue creaming while slowly adding egg whites. In a separate bowl, sift together flour, baking powder, and salt. Add flour mixture alternately with milk to creamed mixture, starting and ending with flour. Stir in chopped Oreos.

Divide batter evenly between pans and bake for 25 – 30 minutes or until toothpick inserted in center comes out clean.

Photobucket
Photobucket

Photobucket